
Blogs
Jewelry 3D Printing Services
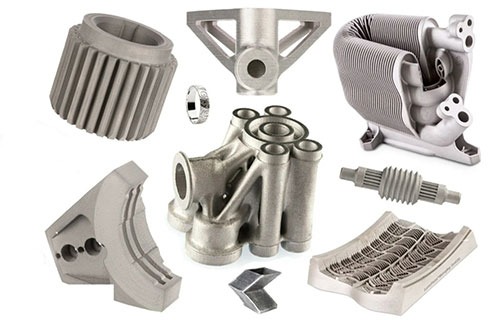
Jewelry 3D Printing Services, explained the way we would explain it across a table: what it is good at, what it costs you, and the details that keep the part out of the scrap bin.
Key takeaways
- Elevate your jewelry business with Jewelry 3D Printing—the future of digital jewelry making that turns bold ideas into intricate, high-quality pieces.
- At our shop, we specialize in turning jewelry visions into reality with a suite of capabilities designed for quality and flexibility.
- Our Jewelry 3D Printing process is a streamlined, client-focused workflow that combines digital expertise with hands-on craftsmanship.
- The material you choose for your 3D-printed jewelry impacts its appearance, durability, and cost.
Jewelry 3D Printing Services
Elevate your jewelry business with Jewelry 3D Printing—the future of digital jewelry making that turns bold ideas into intricate, high-quality pieces.
From custom jewelry production to rapid prototyping in jewelry, our shop leverage additive manufacturing for jewelry to deliver precision, speed, and creativity that traditional methods can’t match. Whether you’re crafting one-of-a-kind rings or scalable necklace lines, our 3D printing solutions redefine what’s possible in jewelry design and production.

Our Capabilities: Delivering Precision and Creativity
At our shop, we specialize in turning jewelry visions into reality with a suite of capabilities designed for quality and flexibility. Our 3D printingservices stand out for their focus on high-precision printing, custom designs, and uncompromising quality assurance—ensuring every piece meets the highest industry standards.
Key Capabilities Overview
| Capability | Details | Impact for Clients |
| High-Precision Printing | Our 3D printers operate at a layer resolution of 25-50 microns (thinner than a human hair), ensuring sharp edges and smooth surfaces on even the smallest details. | Creates jewelry with intricate patterns (e.g., filigree work) that traditional methods struggle to replicate. |
| Custom Designs | We work with clients to modify existing designs or create entirely new ones from scratch, using advanced 3D modeling software to capture every detail (e.g., engravings, gemstone settings). | Enables one-of-a-kind pieces for special occasions (e.g., custom engagement rings) or branded collections. |
| Intricate Details | Our technology supports designs with complex geometries—such as hollow structures, delicate lattice patterns, and micro-engravings—that are impossible to achieve with casting or handcrafting. | Adds uniqueness and luxury to jewelry, making pieces more desirable to consumers. |
| Multiple Material Options | We print with a wide range of materials, including 14k/18k gold, sterling silver, platinum, high-quality resins, and wax (for lost-wax casting). | Gives clients flexibility to choose materials that fit their budget, style, and production goals. |
| Quality Assurance | Every printed piece undergoes a 3-step inspection: (1) digital model review, (2) post-print dimensional checks (using laser scanners), and (3) visual quality testing. Our defect rate is less than 0.5%. | Ensures consistent quality, reducing waste and client returns. |
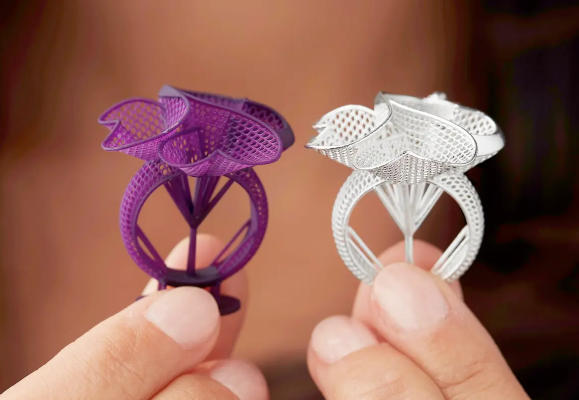
Process: How We Bring Jewelry Designs to Life
Our Jewelry 3D Printing process is a streamlined, client-focused workflow that combines digital expertise with hands-on craftsmanship. From design to finishing, every step is optimized to ensure speed, quality, and alignment with your vision.
Step-by-Step 3D Printing Workflow
- Design and Modeling
We start by creating or refining a 3D model of your jewelry piece using industry-leading software (e.g., Rhino, ZBrush). If you have a sketch or physical sample, our team can scan it into a digital model with 0.01mm accuracy. We share 3D previews with you for approval before moving forward—this ensures you can visualize the final product and request adjustments.
- Material Selection
Next, we help you choose the best material for your project based on budget, style, and durability needs. Options include precious metals (gold, silver, platinum), resins (for prototypes or fashion jewelry), plastics (for lightweight pieces), and wax (for lost-wax casting). We provide material samples so you can test texture and color firsthand.
- Printing and Layering
Once the design and material are approved, we load the 3D model into our high-precision printers. The printer adds material layer by layer—for example, our metal printers use a process called Direct Metal Laser Sintering (DMLS) to fuse tiny metal particles into shape. Printing time varies by size: a small pendant takes 2-4 hours, while a complex ring takes 4-6 hours.
- Post-Processing (Polishing, Finishing)
After printing, we remove support structures (if needed) and refine the piece through polishing, sanding, or plating. For precious metals, we use ultrasonic cleaning and hand-polishing to achieve a mirror finish. For resins, we cure the piece with UV light to enhance durability. This step ensures the final product has a professional, high-end look.
For pieces with multiple components (e.g., necklaces with pendants and chains), we assemble the parts by hand. We add gemstones, clasps, or other accents using traditional jewelry-making techniques to ensure a secure fit. Every assembled piece undergoes a final quality check to confirm all components work together seamlessly.
Materials: Choosing the Right Foundation for Your Jewelry
The material you choose for your 3D-printed jewelry impacts its appearance, durability, and cost. At our shop we offer a diverse range of materials to suit every project—from affordable prototypes to luxury, heirloom-quality pieces.
3D Printing Materials for Jewelry: Comparison
| Material Type | Examples | Key Benefits | Cost Range (per gram) | Best For |
| Precious Metals | 14k Gold (yellow/white/rose), Sterling Silver (925), Platinum (950) | Hypoallergenic, durable, high-value. Ideal for fine jewelry. | 2−20 | Engagement rings, luxury pendants, wedding bands. |
| Resins | Photopolymer resins (clear, colored, or metallic) | Affordable, fast to print, and available in a range of finishes (matte, glossy). | 0.10−0.50 | Prototypes, fashion jewelry, temporary pieces. |
| Plastics | Nylon, PLA | Lightweight, flexible, and cost-effective. Good for casual jewelry. | 0.05−0.20 | Casual bracelets, kids’ jewelry, promotional items. |
| Wax (for Casting) | Investable wax | Used to create molds for traditional casting. High detail retention. | 0.30−0.80 | Mass-produced jewelry (e.g., batch orders of necklaces). |
| Composite Materials | Metal-infused resin, carbon fiber-reinforced plastic | Combines the benefits of two materials (e.g., metal look with resin affordability). | 0.50−1.50 | Statement jewelry, eco-friendly designs, budget-friendly luxury. |
How to write a spec that gets priced correctly
A drawing is a contract. If it leaves a number open, the shop fills that number in with its own default. The default is rarely the one you had in mind. Put these five lines on every RFQ and most of the back-and-forth disappears before it starts.
- A model and a drawing that agree
- Material by standard number
- Tolerance only where it mates
- Finish and the faces it applies to
- Quantity and required date
The point is not paperwork. Each line removes a decision the shop would otherwise make for you. A complete RFQ comes back priced. An incomplete one comes back guessed.
What actually drives the price
Buyers usually push on material because it is the line they can see. In practice the material is rarely the biggest number on a quote. These five lines decide most of it:
- process choice
- material
- tolerance band
- finish
- volume
Ask for the quote split by line. A supplier who cannot break it down is guessing, and you will pay for the guess. The line you can usually renegotiate is the tolerance band, not the raw material.
Problems you will meet, and the fix
Every process has a failure mode it prefers. The same four show up again and again on this kind of work, and none of them are mysteries once you know what to look for.
- A drawing that contradicts the model
- A tolerance with no datum
- A cosmetic callout with no approved sample
- A quote compared against a different scope
Catch the fault on the first part, not the hundredth. A first-article check costs an hour. A bad batch costs the whole order. Write the check into the purchase order so nobody has to remember it.
What to check on the first article
The first article is the cheapest inspection you will ever buy. Use it properly and the rest of the run becomes boring, which is exactly what you want.
- Every dimension on the drawing, with the measured value written beside it.
- The material certificate, matched to the heat or lot number on the parts.
- The finish against the sample you approved, under the same light.
- Fit against the mating part, assembled rather than measured.
- Packaging, because parts that arrive damaged were never in tolerance.
Check in this order: datums, then mating features, then cosmetic faces. If the datums are wrong, every number after them is noise. Keep the report on file. When a problem shows up in month six, that document is the only thing that tells you what changed.
How to compare two quotes fairly
Two numbers are not comparable unless the scope matches. Line them up before you decide, because a low number with three gaps is not a low number.
Same drawing, same material, same finish, same inspection. Anything else is a different job wearing the same part number. Then look at what each quote leaves out. Freight, packaging, certificates and tooling are the usual gaps.
Ask each supplier to state their assumptions in writing. The one who does is usually the one who has run the process before.
Scaling from one part to a batch
The first part teaches you the process. The hundredth teaches you the process cost.
Watch three things as volume grows: setup amortisation, tool wear, and how much hand work the finish still needs. If the unit price barely moves between ten and a hundred, the cost sits in material or in hand work, not in setup. Ask which, because only one of them is negotiable.
Lead time behaves the same way. A one-off is scheduled around other jobs. A repeat order is scheduled around your forecast. Give the shop a forecast and the lead time gets shorter, not longer.
How to read a supplier's quote
A quote is a short document with a long shadow. Four things in it decide whether the job runs smoothly, and only one of them is the price.
- The scope line. It should name the process, the material and the finish, not just the part.
- The tolerance basis. General tolerance or the drawing, and which standard it follows.
- The exclusions. Tooling, freight, certificates and inspection are the usual omissions.
- The validity date. Material prices move, and an open-ended quote is a promise nobody can keep.
Read the exclusions before you read the total. A quote that leaves out tooling is not cheaper. It is a quote for a different job.
What to send with the first order
The first order sets the pattern for every order after it. Send a complete package once and the shop files it, and the second order takes a fraction of the time.
- A STEP or native model plus a PDF drawing carrying the same revision letter.
- The material callout by standard number, not by trade name.
- The finish and the exact faces it applies to.
- Any test the part must pass: fit, seal, drop, salt spray, dielectric.
- A contact who can answer a question inside one working day.
Then write down what was agreed. An email that confirms the material, the finish and the date is worth more than a longer purchase order that leaves them open.
When this is the wrong choice
A good supplier tells you when the process does not fit. These are the cases where we say so.
- The volume is so low that setup costs more than the parts are worth.
- The tolerance is tighter than the process can hold without a second operation.
- The geometry cannot be made without a tool feature that will not pay back.
- The material you need is not available in the form the process requires.
- The schedule is shorter than the tooling or setup time, and nobody has said so yet.
None of these are refusals. They are reasons to look at a different route, and the earlier that conversation happens the cheaper it is. The most expensive mistake in manufacturing is a process chosen before the question was understood.
Planning the ramp from prototype to production
The gap between one good part and a thousand identical ones is a plan, not a machine. Three decisions close it.
First, freeze the design. Every change after tooling starts is a re-cut, and re-cuts are where schedules go. Second, decide the inspection level. A prototype is checked by eye; a production part is checked against a report. Third, agree the change process in writing, including who pays for it.
Write the ramp down as dates and owners, not as intentions. A ramp plan with three names and three dates is worth more than a page of good intentions.
Case Studies: Real-World Success with Jewelry 3D Printing
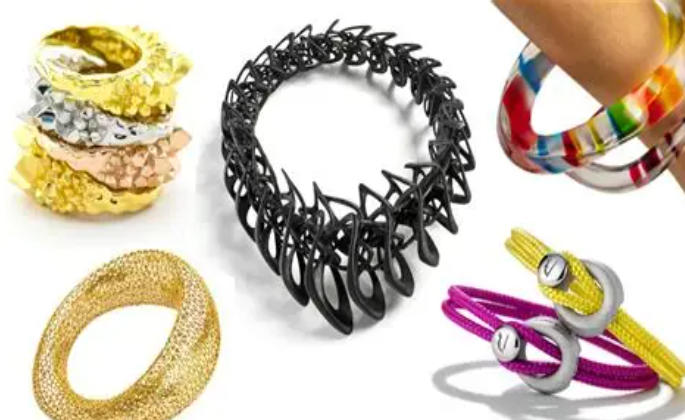
Our clients have used our 3D printing services to solve unique challenges, launch successful collections, and delight customers. Below are three case studies that highlight the power of Jewelry 3D Printing in different scenarios.
Case Study 1: Custom Engagement Ring for a High-Profile Client
- Challenge: A luxury jewelry brand needed a one-of-a-kind engagement ring for a celebrity client. The design included a 3D-printed diamond-shaped pendant with micro-engravings of the couple’s initials and a hidden “love note” inside the band.
- Solution: We used high-precision 3D printing with 18k white gold to create the band and pendant. The hidden engraving was made possible by 3D printing’s ability to create hollow structures. We printed 2 prototypes for approval and delivered the final ring in 5 days.
- Result: The ring received widespread media coverage, and the brand reported a 20% increase in custom ring inquiries within a month. The client called the piece “beyond my wildest expectations.”
Case Study 2: Scalable Necklace Collection for a Fast-Fashion Brand
- Challenge: A fast-fashion jewelry brand wanted to launch a 10-style necklace collection for the holiday season. They needed 500 pieces per style (5,000 total) and required a 4-week turnaround to meet retail deadlines.
- Solution: We used wax 3D printing to create molds for each style, then cast the necklaces in sterling silver. This combination of 3D printing and traditional casting reduced production time by 60% compared to full casting. We also implemented quality checks at every step to ensure consistency.
- Result: The collection launched on time and sold out in 3 weeks. The brand saved 30% on production costs and has since partnered with us for 4 more collections.
Case Study 3: Eco-Friendly Resin Jewelry for a Sustainable Brand
- Challenge: A sustainable jewelry brand wanted to create a line of eco-friendly earrings using recycled materials. They needed the earrings to be lightweight, hypoallergenic, and affordable.
- Solution: We recommended recycled resin for the earrings, which is made from 70% post-consumer plastic. We used 3D printing to create intricate floral designs and added a hypoallergenic metal backing. We printed 1,000 pairs in 1 week.
Result: The line was featured in a major sustainability magazine, and the brand saw a 45% increase in online sales. Customers praised the earrings for their “unique design” and “eco-friendly mission.”
Our solution for Jewelry 3D Printing Services
YiguProto runs custom manufacturing in house, from a single prototype to a production batch. We quote the process, the material and the finish as separate lines, so you can see where the money goes instead of arguing with one number.
Send a STEP file or a drawing and you get a DFM report in one to two business days. It flags the features that add cost and the features that will not hold tolerance on the process you picked.
Every order ships with an inspection report on the features you call out. If a part misses, we make it again. Ready to price a part? Start with a free quote and DFM review, or read more about our custom manufacturing. You can also talk to an engineer before you commit to a drawing.
FAQ about Jewelry 3D Printing Services
How long does it take to 3D print a piece of jewelry?
Printing time depends on the size and complexity of the piece. A small, simple earring takes 2-3 hours, while a large, intricate necklace pendant takes 6-8 hours. The full process (design + printing + post-processing) typically takes 3-7 days for custom pieces and 2-4 weeks for bulk orders (100+ pieces).
Is 3D-printed jewelry as durable as traditionally made jewelry?
Yes—when made with high-quality materials (e.g., precious metals, durable resins), 3D-printed jewelry is just as durable as traditionally made pieces. Our 14k gold 3D-printed rings have a lifespan of 10+ years with proper care, and our resin jewelry is resistant to scratches and fading (tested to withstand 500+ wear cycles).
Can I use my own design for 3D-printed jewelry?
Absolutely! We accept custom designs in a variety of formats (e.g., STL, OBJ, CAD files). If you only have a sketch or physical sample, our design team can convert it into a high-precision 3D model—we’ll share the model with you for feedback and make adjustments until it matches your vision. We also offer design consultations for clients who want to refine their ideas (e.g., adding structural support for a delicate pendant or adjusting proportions for a ring). There’s no extra cost for design conversions or basic consultations, making it easy to bring your unique concepts to life.
What is Jewelry 3D Printing Services used for?
Jewelry 3D Printing Services turns up wherever the part has to do a real job at a predictable cost: brackets, housings, fixtures, covers and the fittings that hold them together. The honest test is whether the properties match the load and the environment, not whether the material is fashionable.
What tolerance can you hold on Jewelry 3D Printing Services?
The working default is ±0.1 mm as a working default. Tighter than that the process changes and so does the price, because every step tighter adds inspection time. Call out only the faces that mate with something else and leave the rest on the general tolerance.
What files do you need in order to quote?
A STEP file plus a PDF drawing that carries the same revision letter. The model carries the geometry and the drawing carries the intent. When the two disagree, the shop picks one, and it is never the one you meant.
The short version
Jewelry 3D Printing Services rewards the buyer who reads the data sheet and the drawing together. Pick the option for the property that matters, not for the price per kilo.
Tighten only what mates. Test a sample before the run. Then let the process do the rest.